If you’ve always wanted to make those amazing sourdough pizzas you eat in restaurants and see on social media but, like most, aren’t really sure where to start? Never fear! Our development chef, Joe Boiling has shared this handy guide on how to build and maintain your very own sourdough starter (and it’s not as hard or scary as we thought!)....
“Sourdough is basically an edible tamagotchi” Meik Wiking, Author.
For the uninitiated, a Tamagotchi was a small electronic pet you kept alive by ‘feeding’ it regularly. In exchange, it would entertain you with games and fill your life with happiness - just like a sourdough starter, minus the games.
Sourdough baking can appear like a mythical world of odd language and science that can seem quite intimidating. But it really isn’t. We know that when we make bread (or more importantly, pizza) we need yeast to allow our dough to rise. Ordinarily we use dry or fresh yeast but with a sourdough starter, we create our own colony of wild yeast to do the job for us. Wild yeasts lead to pizza that is more digestible, better for us and, crucially, lots of fun to make!
Wild yeast is everywhere; on the skin of grapes, in the air, in the bag of flour you’re about to open to start building your sourdough starter after reading this - everywhere. This doesn’t mean we need to walk around with a net to capture these little guys whenever we see them (although that might work) as all we need to do is provide a space where these wild yeasts can flourish given time. By simply mixing together flour and water and leaving it for a period of time we will be able to capture these wild yeasts in a controlled environment and they can, in turn, make us incredible pizza dough.
A Note on Equipment….
You don’t need loads of expensive equipment to begin building your starter but below are what I believe to be the essentials.
- 2x Glass jar with a loose fitting lid. It’s important you can leave the lid ajar to allow our little yeasty boys to burp and fart out the carbon dioxide and other by-products they will produce!
- Temperature probe. As you progress on your sourdough journey it can be helpful to monitor your starters behaviour at certain temperatures (but that’s a while away), initially, this will be vital piece of equipment to allow you to check the temperature of your water for feeding your starter (more on that later!).
- Flour. The choice of flour is very important when creating our starter. Get the best you can find/afford and make sure it’s unbleached and organic if possible- this will give your starter the best chance of becoming big and strong!
- Accurate electronic scales. Weigh. Everything. Including. Water. This is important with all baking but particularly so as we develop our starters strength.
- Rubber Spatula. This will make it easy to perform your feeds and easier to clean up.

Day 1:
Once all your equipment is ready and prepared you can… *drum roll* …. Begin your journey to sourdough pizza nirvana!!!
Place 100g of Rye flour into your jar and add 125g of water at a temperature of 75f/24c and mix together well with your spatula ensuring there are no dry bits remaining.

Cover with your loose fitting lid and leave on a side in the kitchen- ideally at around 73f/23c - for 24 hours.

Day 2:
If you’ve rushed home to see what exciting developments have taken place in your wild yeast colony, you may be disappointed; as you can see from our photos, ours had barely changed during this first 24 hour period. You’ll have quite a few days during this process where it will appear that nothing has happened in your jar; but trust in the process, follow the schedule, and all will be well!
 It’s time now to perform your first ever ‘feed’ of your starter. Thankfully feeding your sourdough starter doesn’t involve booking a table at the local restaurant and sharing a candlelit dinner with your new friend, it simply means keeping a small portion of starter, discarding the rest and adding a larger amount of flour and water for it to ‘feed’ on. How much we keep and how much we feed it will alter slightly over the next seven days to give us the best possible chance of producing a brilliant starter but we will settle on a regular feeding pattern after 7 days.
For this first feed you want to take 70g of your starter into your clean jar, add 110g of water (at 75f/24c) and mix up with your spatula before adding 50g of rye flour and 50g of all purpose or plain flour and mixing again until there are no dry bits.

Pop your loose fitting lid on the jar and leave in the same place as yesterday for 24 hours.

Day 3:
On day three you may find you can see some bubbles forming and some cool activity happening- that’s science bro! Equally, nothing might have happened at all yet- just trust the process! You can see from our photo we had a decent rise on this day- but all starters are individuals (at this stage your starter is kind of like a precocious teenager) so don’t fret if yours is looking different at this point.
>For our day 3 feed, we’re going to perform exactly the same feed as yesterday so, retain 70g of starter, add 110g of water (at 75f/24c), 50g of rye flour, 50g of all purpose/plain flour and mix well before covering and leaving in the same place.
At this point, it's a good idea to mark your starter with a rubber band around the jar marking the height of the starter; this will allow you to see how your starter is rising and falling as it grows.
Day 4:
By day 4 the activity in your starter will be starting to pick up pace (even if it’s not visible to the naked eye yet!) and you can see some great bubbles in ours below!. This is a good time to advise you to give your starter a name (mine is named after my favourite football player but you can call yours whatever you want- perhaps call it Joe so I can feel like I’ve played a part in your journey and it can inflate my ego when I see it on social media).
For your day 4 feed you want to retain the same amount of starter as the last 2 days (70g) but add a little less water; 100g at the same temperature as previously used. Add your flours (50g Rye and 50g AP/Plain) and mix well before marking the height with your rubber band, popping on your loose fitting lid and leaving on the kitchen side for another 24 hours.
Day 5:
Do exactly the same thing as yesterday. I’m not going to type it all out again as I have a word count to consider…. Our starter was producing a small rise and showing plenty of bubbles by this point but, again, don’t worry if yours doesn’t match our pictures, everyone is different!

Day 6:
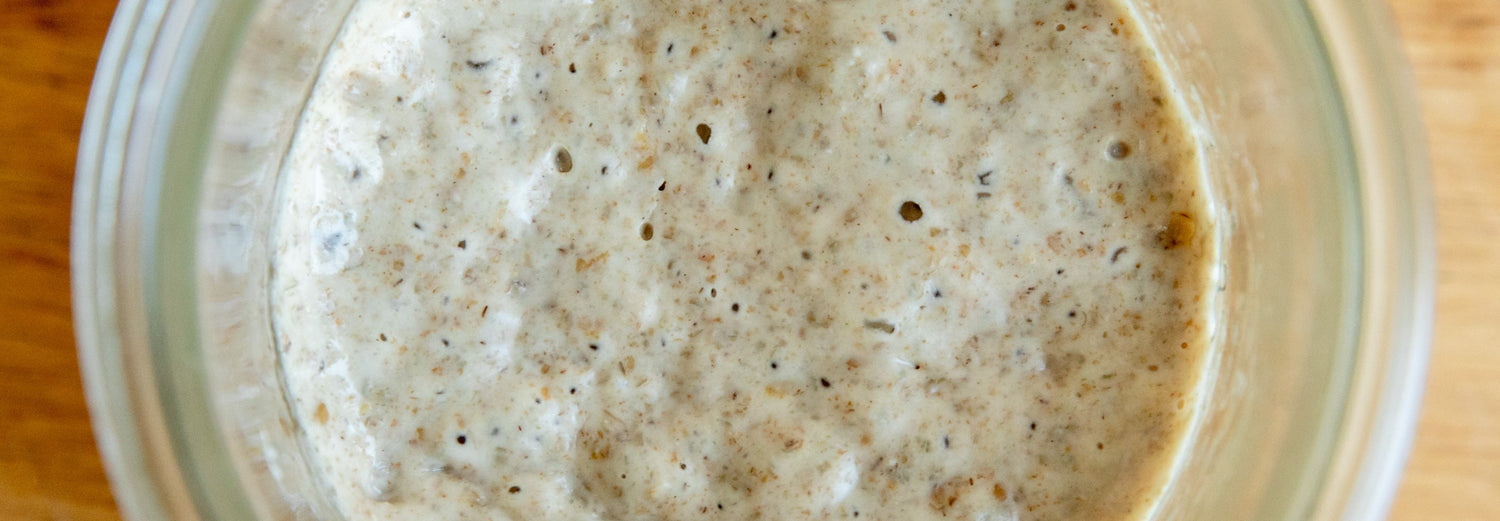
On the morning of day 6 we were greeted by a good amount of bubbles and a decent rise. I would hope you are seeing similar activity in yours by this point but, I reiterate, if you’re not, just keep going!!
We’re getting VERY close to dough making time now! On this day, you need to keep 50g of starter and feed it with 100g of water (still at 75f/24c), 50g of rye flour and 50g of AP/Plain flour.
Mix and push down as normal, mark off with the rubber band, top with the loose fitting lid and leave inthe same place for another 24 hours.
Day 7:
The final day! You’ll note that we can clearly see that the starter has ‘peaked’ (that is, risen as much as it will) and began to fall in our photos. To maintain a strong starter this is a good indicator of when to feed- if we let it drop too far before feeding, we risk compromising the strength of our new friend.

The feed we perform today will be the feed you’ll want to use moving forward and for this you want to retain just 25g of starter before adding 100g water (at 75f/24c), 50g rye flour and 50g AP/Plain flour. 
And that’s it, pat yourself on the back and treat yourself to a new hat because YOU have just made a sourdough starter 👏.
It would be advantageous to wait 10-12 days before using it as it will get stronger and develop better flavour over time- that’s why you hear people brag about the age of their starters- ‘oh this is a thousand years old and was passed down to me from my Italian grandmother who used to make bread for Gheghis Khan’ or whatever, but if you can see bubbles and you’re seeing a regular rise and fall, you’re good to bake.
What now……
So, what now?! You’ve followed this schedule meticulously for 7 days and have been left with a jar of pleasantly smelling goop but what do I do with it now I hear you ask! You use it to bake pizza of course!
Remember the rubber band we put round the jar on day 3? We can use that as a guide to know when to use our starter. All sourdough starters are different but, ideally, you want to wait until you see a 2-3 times height rise above the rubber band after feeding before using your starter. This ‘rise and fall’ will tell us that our wild yeast colony is happy and ready to lift our pizza crust!
Perhaps you only want to use your starter once a month- that’s cool. After feeding, when your starter has peaked (that is, risen as much as it will) you can pop it in the fridge. Then, a couple of days before you want to bake with it, take it out of the fridge and perform a couple of feeds to wake him up and get him up to full strength.
Now your starter is established and we have a happy, jolly colony of bacteria and wild yeast you can experiment a bit more too. The rye flour is vital to kick starting our starter but now it’s big and strong and bubbly we could drop the amount; for example, you could start feeding 80g AP/Bread Flour and 20g Rye flour to your starter. Then make a pizza to bake in Roccbox or a loaf in your Black Edition WFO, see what you think and maybe alter your starter accordingly.
Whatever you do, have fun with it and don’t be scared! This starter is pretty resilient and will survive you missing a feed, feeding it a bit too much and, if it does die you can always make another one…. Or get a tamagotchi instead.